Saturday, October 28, 2006

JUB For Dummies - Basics - Chapter 7

How to Send, delete, read Private Messages - Chapter 7

Okay everyone probably knows how to get PM's from people, or send them. But then there are others who have no clue to what a PM even means. So here we go.

Sending Private Messages

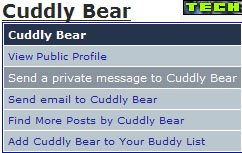
Step 1: Sending a PM is kind of easy, all you do is click on someone's name on a post.


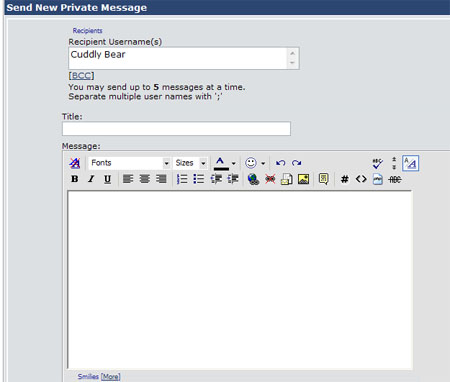
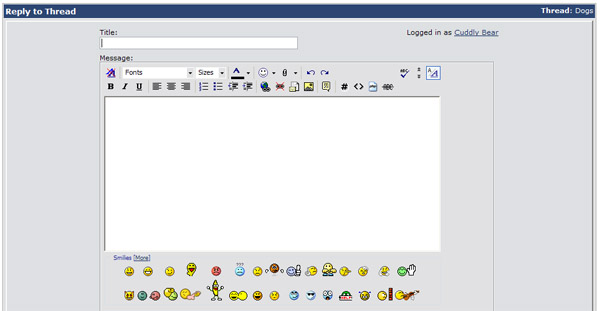
Step 2: It will send you to this which will yet again look as if you're posting a thread or a reply to a thread. You can put up to 5 Recipents to send a private message to five other members.


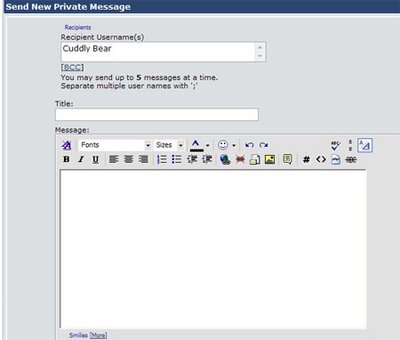
Step 3: After you've completed everything you just send the person the private message, and when they receive it, they can reply back to you.

Reading Private Messages

Step 1: When you get a private message you'll see a window pop up saying that you received a message from a member. To turn this feature off you to go My Settings, under Control Panel in the Settings and Options category you click Edit Options and you can turn this off.

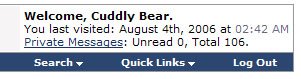
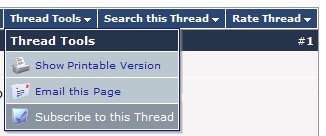
Step 2: If you have trouble locating where to get to your private messages you should find it near where it displays this information.


Step 3: When you click on Private Messages it will take you to your private messages displaying all your private messages, the newest message will be highlighted in white and the old messages will be highlighted all in a lite grey color.

Deleting Private Messages

You can delete private messages as well, cause if you don't you'll have a large amount and if you exceed your private messages nobody will be able to send you messages. As of August 4th, 2006 as it states in Private Messages, you can have 1000 Private messages in your box. This might change depending on how much the Admins want to put. So it changes a lot.

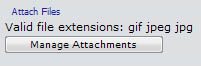
Step 1: Okay when you're in the private message area you'll see this. Like little buttons to click on.


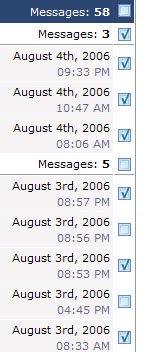
Step 2: You click all the messages that you want to delete, by clicking one list you can delete an entire list of Private messages without having to click each little check off box.

Step 3: When you think you're done deleting your messages, you can scroll down to the bottom where you see Selected Messages, and a pull down menu. You click the pull down menu and it will display if you want to move them, or if you want to delete them. You can delete them.

Step 4: When you have deleted the messages you can do this to Sent messages as well.

JUB For Dummies - Basics - Chapter 6

How to leave a comment and read comments - Chapter 6

Leaving a comment is really simple, usually its a faster way of doing it than PMing someone to comment about their post on a thread.

Step 1: On each post near the lower left hand corner of the screen you'll see an icon that looks like this. 
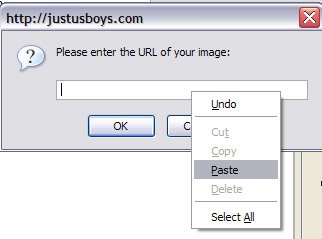
You click the person that you want to make a comment to. A window will appear, in it you can make a comment to the poster. It will look like this.
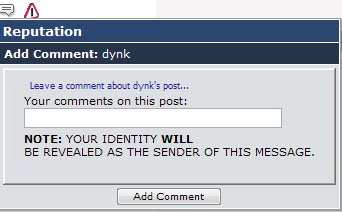


Step 2: After making your comment the poster can see who made comments to them by going to My Settings.

Step 3: Under the category Latest Comments Received you'll see all the many comments that members have left you. Telling you which thread the member commented you from, the date and time, the person who made it, and the comment.

JUB For Dummies - Basics - Chapter 5

How to Subscribe to a thread - Chapter 5

Okay, this option I rarely use, but people use this to keep up on if a thread is updated or just to keep it in their subscribed threads section so they know how much activity its getting.

Step 1: Click on any kind of thread you want to subscribe to.

Step 2: To do this on the top of each thread you'll see this. Thread Tools is what you want, click on it and a pull down menu will appear giving you three options. You click Subscribe to this thread.


Step 3: After doing this it will bring you to an area where it'll ask you how you want to be notified about this thread. You can choose from No email notification, to Instant, Daily, and Weekly email notifications.

Step 4: Whatever choice you choose you can view all your Thread subscriptions in your My Settings it will be under the category. New Subscribed Threads. It will tell you how many posts, views, and who was the last to post in it, and at what time.

This is a simple way to find out about threads you're interested in. Enjoy.

JUB For Dummies - Basics - Chapter 4

How to attach an image to a post - Chapter 4

When viewing most posts you'll see someone posting an image on it, but its in a little thumbnail under their post. Its called an Attachment, the same way people do to attach pictures to emails. Well you can do it to posts as well. Its real simple!

Step 1: You found a picture you'd like to show to other people. Okay well since you're a pro at making posts, all you need to do is just Post a reply. With each post you'll see a category named Additional Options which gives you the change to do many things with your post. But right now we'll be using the Attachments.


Step 2: You'll see the options that look like this. Click on the Manage Attachments button. Make sure you know that the valid file extensions are gif, jpeg, and jpg.


Step 3: A new window will pop up on your screen giving you a place to put your attachments at. As you can see in the picture below that I already have something in my computer to attach.


Step 4: Okay, now all you have to do is upload the attachment by clicking the first upload button. The second upload button is used if you want to upload an attachment from a website. Also make sure to look at the Attachment key to see the Max filesize, and max width and height for the picture. Which fall around 1200 x 1200 pixels with a max file size of 200KB.

Step 5: After clicking upload you'll see this.


Step 6: You can remove it or leave it there, you can also upload more attachments if you want to. After you're done with that you can go close the window. Now you'll see your attachments on the Reply to post. All you have to do now is just click on Post Reply and you'll see your attachment.

Now you're becoming a JUB pro by posting an attachment. To be perfectly honest, this is probably the hardest thing to do for most members. Enjoy!

JUB For Dummies - Basics - Chapter 3

How to upload an avatar - Chapter 3

Alrighty then. You've learned how to make a post, make a thread you're apart of the JUB family now. But you want to be like everyone else and have a picture to display under your name after each post. Well that is called an avatar, its real simple to upload. But due to the time I have, I'm unable to give a tutorial on how to make it since there are many different software.

My best bet is to go around looking in the Tech forum on how to make pictures, crop, resize. There are free programs on how to do this. Okay let's get started.

First is first rules must be followed.

Please note that you are not allowed to use images of people under the age of 18, even when it is an old photo of yourself.

Step 1: You have your avatar, your avatar size is perfect, and the file size is acceptable as well. You have no idea where to find this though. Okay let's just click on My Settings.

Step 2: On the category Homepage Manager on your Control Panel. Click on Edit Avatar. You'll be brought to a screen that looks like this.


You'll see an empty avatar slot near where mine is.

Step 3 If you have a Custom avatar you show off to JUB. You can easily upload it by using either a website address (Opition 1) or upload it from your own computer (Opition 2). When uploading a custom avatar it will look like this.


You'll see the little note on the bottom for the maximum dimensions that your custom avatar should. The file size can be up to 60KB. For JUB Supporters you'll see this picture above. For Non-JUB Supporters the dimensions for you would still be 100 by 120 pixels, but in file size you'll be around 30KB

Step 4: When you're ready to upload your avatar jus click Save Changes and you'll see your avatar appear where my avatar is.

Now you'll be able to be apart of JUB with an avatar to show off. Have fun.

JUB For Dummies - Basics - Chapter 2

How to make a Thread - Chapter 2

Making a thread can be easy for some, but there are those that are completely new to this and don't know how to make one. Here we go.

Before we start creating threads you have to be sure where you want to put your thread at. JUB has many different categories. If you're wanting to post a heated discussion its likely to fit in Hot Topics, if it has anything to do with Politics it will be in the Current Events & Politics forum.

If you're a new member and want to post a thread introducing yourself to the forum you can go to Freshmen Orientation - New User Forum if you feel that you posted in the wrong forum, don't freak out, you can PM (private message) an admin or a mod to have the thread moved to the desired location you want, or an admin or a mod will already know where to place your thread.

One more thing before I go into the steps of how to make a thread. When you look through the threads make sure to read the stickies that mods, admins place on top of the forum you are browsing through. It's REAL important that you do this because you could be posting something that isn't suppose to be posted. So make sure you do this or there could be a slight chance that your thread will be deleted or closed. Thanks. So lets go through this one more time.

- Know where you're posting your thread at
- Post a new thread in Freshmen Orientation Forum if you're wanting to introduce yourself.
- Look at the stickies and announcements at the top of each forum you go to.
- PM an Administrator or Moderator to have your thread, deleted, moved, or closed.


Okay here we go.

On each forum you go to you'll see a button that looks a little like this.

Step 1: Click that button in order to create your very first thread.

Step 2: When posting a new thread it should look like as if you're making a post on a thread.


Step 3: Okay you'll notice that you it says Post New Thread you go to putting in your thread title, your content you decide to put into the thread.

Step 4: When you're done with putting the title, and placing what you want in your thread you have a choice of posting a Post Icon. If not then the default post icon will be

Step 5: You can preview your post to make sure everything is to your liking. When you think you're ready all you do is click on the button saying Submit New Thread.

UPDATE: Prefix. In certain sections you'll have a Prefix area to where you can add things like Attention / On-Topic Discussion. This is optional for anyone who wants to create a thread but its more of an easier way for people to pay close attention to threads with prefixes.


You'll see your thread instantly on the top of any forum that you post your thread on, people will post in it and you'll be apart of the JUB thread posters. Enjoy

JUB For Dummies - Basics - Chapter 1

Introduction - Basics

Okay I said that we would get back to the basics. So this post will show you what to do with category. Okay let's get started.

How to make a post - Chapter 1

Okay this might be probably a real easy thing to do because everyone knows how to do it, but if some of you might be confused here you go.

Step 1: If you want to make a post on a thread you open the thread you want to post a reply on.

Step 2: On top you'll see one button to the left of the member's thread post. It will look like this.


Step 3: You click on this, it will bring you to screen that will look like this.


It should be pretty simple. In the title area it will be something like this Re: Title Thread Name post whatever you plan to post in the big white area, below are smilies to use for your post. There are hundreds of smilies to choose from.

Step 4: When you're done with everything, you can either preview your post or click on Submit Reply.

Your post will show up and you'll be apart of the JUB posters. Enjoy.

JUB For Dummies - Chapter 3

Chapter 3 - Using Multi-Quoting

This feature is SO damn useful as its so hard trying to go back and putting in quotes and copying and all that junk. Thank you for adding this feature for the JUB members to use.

But it seems some people are having problems with it, and are unable to find out how exactly to use it. Okay lets quote some people here.

1. You'll see this when its off and this when its on

2. Click the people you want to use quotes for.

3. When you're finished click the button, when it takes you to the post a reply to thread section. Your selected quotes will be displayed. This also works too if you click as well. So you can do either way and it will still display the quotes.

4. Don't forget if you hate having to scroll all the way down just to click on the Post Reply button you can click on

It will take you down to the bottom of the page where Quick Reply is located.

JUB For Dummies - Chapter 2

Chapter 2 - Link a website using a Picture

This is going to be a fun chapter.....right.

Before we start here is what JUB puts on their signature rules.

Linking to personal blogs in signatures is allowed, but you must have a reciprocal link on your site to at least one of the following: JustUsBoys.com, RocketTube.com, BestGayBlogs.com, Bearzone.com, or GayAgenda.com. We have provided a selection of adult and non-adult links to pick from so there is no reason that you can't link back to at least one of our properties. Additionally, only one link is allowed per signature. If you are linking to a commercial site that you own or work for, then you must be a JUB Sponsor and the link to your site must use the official JUB redirect link to credit us for sales. To become a JUB Sponsor you should go to Jubsupport.com and create a ticket seeking information. Signature links to blogs or sites that promote adult sites as an affiliate are in direct competition to JustUsBoys.com and can not be allowed under any circumstance.

You have a website you want to show off, but you hate using text on your siggy so you just want to use your signature picture as a link? Okay well, this might be a little hard for beginners but then it will be easy for those who know.
1. Edit Signature.
2. Time to use that function that I talked about last chapter the editing mode. Okay you have a Simple Mode and a Editing Mode. When you go into Editing mode you'll be introduced to a lot of weird shit that will freak you out. Click the near the ABC and the check mark.

WARNING: These pictures are outdated so your Editing Mode might look different (YouTube icon)

You'll go from this:


To this:


3. Okay yeah you're confused and have no idea what the hell this means. Okay I just want you to concentrate on one thing in that code. Is the SIGPIC code. There is a code out there that will add the URL to it. Which will look like this.


4. Okay use this code to put infront of the SIGPIC code. So it will look like this.


Once you have this, preview your signature. If you roll over the image and you get the link showing up then it worked. If not, try repeating this very slowly to find out what went wrong.

JUB For Dummies - Chapter 1


JUB For Dummies tutorial by Brandon (GamerBear)
www.justusboy.com


Chapter 1 - How to add a signature picture

1. Click on My Settings.
2. Click on Edit Signature Text
3. You'll be followed to this screen which will look like this.


It almost looks like as if you're writing a post on the message board but you're not. Okay some of you probably already know how to use this. But then maybe some of you don't.

4. Upload a picture. Make sure that it doesn't exceed the requirements which are 480 x 60 resolution. A size of 43KB. If you make over 1,000 posts this will change from 500 x 100 and giving you a file size of 78KB. If you get a JUB Supporter account you can change it to a bigger size. Once you upload your picture for your signature you should get the results below.

5. Okay now do you see the little text below the image that says Insert Signature Picture? Click this link, scroll back up to find something added to your text.


6. What the hell does SIGPIC mean? I'm totally confused! Well that right there is your sig picture. So as long as you don't mess with the SIGPIC stuff then you're good. To make sure that you know everything is correct. Click Preview Signature. Doing this the results will look like this.


Hopefully that wasn't too hard for you.

How-to take a screenshot (Windows)

How to Take a Screenshot Using Windows XP
Note: This How To describes the process in Windows XP. It should work almost identical in Windows ME. You might have problems saving the file as JPG in Win95/98 though. If this is the case, please ask in this thread for more directions.
(Corny)

Part 1 - Cropping the problem

If you need help on getting a screenshot and resizing it this is how you do it.

You need to take a screenshot of the problem, sometimes it's better to take a screenshot of the entire desktop but then you probably don't want to let people see your personal files on your desktop. So you might need to crop the image or the area of the problem. If you don't have enough experience with doing this try the programs that Windows XP provides you with.

- Microsoft Paint (Located in Start, All Programs, Accessories, Paint)
Here is what Paint looks like.

Sometimes it's better to have it close to you if you do a lot of screenshot taking. Oh by the way, don't mind the look of the windows.

Okay now that you have have Paint open. Take a screenshot of your desktop by pressing on your keyboard. Prt Scr. If you're uncertain of the location of where this is, I've posted a layout of an original keyboard. I also circled it as well.


Once you press that button it will automatically copy the desktop onto your clipboard, so you need to go back to Paint and paste it in there like the example below.


Depending on how big your screen resolution is, it will affect on how much you need to resize your image. So once you pasted it, it should look something like this.


Looks like my desktop image is a little too large. But then again we're not wanting the entire desktop, we're wanting the problem that we want to show the people that are trying to help us. So my problem is my Weather.

Let's make sure the select tool on paint is selected. I circled it to make sure you know where it's at.


Okay let's select the problem now by using your select tool by moving your cursor like the example below. Once you do that right click it, and you can either cut or copy. I would usually copy just in case something might happen with the cut image.


Once you copy or cut the area you want selected. Go over to File, click it then go to New and click it.


Once you're in your new file, it will ask you if you want to save the desktop image, now since you already got what you need you don't really need to save it. But it's your choice to save your desktop image or not, now that we got what we need.

It will open up an entire new white canvas. Go to Edit, and paste the image. As I did down below. There will be a white are depending on how your canvas looks when you opened the program.


Well I need to get rid of that white area around the picture. Click on the white area to deselect the copied picture. If you do this you're unable to move the picture around so make sure you have it in the upper left hand corner like the image above.

Well now you have dots at the corners of the white area. So this means you're able to make the white area smaller.


Now use your mouse to click the dot on the lower right hand corner. The icon will change into a resize arrow. Move that dot closer to the image you copied. Once you get it closer let it go. And it should look like this.


Okay you're almost home now. Let's click File, Save As. Okay since JUB allows JPEG images, and I would save it as a jpeg, the reason of this is because if you save it as a BMP it will be too large depending on what you're saving, sometimes it can lead the file into being 1MB in size which is too large to upload here at JUB. Save it as a JEPG as the image shows you below. Please don't freak out because you see Mac icons, it's Windows XP just with a Mac theme. Don't sweat it.


Once you have it all saved, upload it somewhere, my choice would be uploading it to your JUB gallery in a folder whatever you want it to be called. Once you upload it.

Go look for your image in your gallery. When you're there right click the image and go to properties. Get that link that's in it. As it looks like in the image below.


Okay well now that we got that out of the way head over to the Tech Forum. Make a thread. Title it something that will be useful to people who are trying to help you with your problem.

By now it should all be down hill as you already know how to post a picture on here by selecting the image on the thread tool bar then putting in the address. Once you got all the information you need in great detail so others can know what the hell you're trying to tell them. It should look like this. Oh yeah I couldn't make up a good example of my weather problem so please don't make your posts like this it will be EXTREMELY hard for people to help you.


Once you have all that just post your thread and wait until someone can assist you with your computer problem.

How To Post Pictures on The Boards

This was an old tutorial I had given to someone on JUB. I hope its useful for people who plan to post pictures on the boards. I think some people have already explained this better or people will simply use the attachments, but here is an alternative way of it.

Okay you want to learn how to post a picture on the board, but you don't know how to do it?

Okay first you get the picture you want to post first. You right click. This is what you'll get when you do it with either Firefox or Internet Explorer. I'm giving you both ways because I don't know which one you use.

Firefox


Internet Explorer


Okay next you click on Properties, it will give you a window like this when you do it on either Firefox or Internet Explorer.

Firefox


Firefox Alternate Image Copy


Another way of copying the image and not having to go through properties is just simply right clicking the image, and selecting Copy Image Location.


Internet Explorer


Okay whatever one you're using you just select the address which will be this.

http://usuarios.lycos.es/nepalgves/sessio%20sites/winnie%20the%20pooh/pooh.jpg

Okay when you have it selected right click and copy it or you can simply on your keyboard hold Ctrl and press the letter C and it will copy the selected text for you. Try it out first so that you know how to do this. Now that you have the text copied. You can go to the message board and paste it into the follow.

On the board you'll see the toolbar when writing posts.


Okay do you see the little thing on the tool bar that looks like this? Okay you click that. Sometimes sections of JUB don't have this picture, so it pretty much means that you can't post pictures in it, unless you use the attachments. It will open an option that will look like this on either Firefox or Internet Explorer. You paste the address in there you can either right click and hit paste or you can use the keyboard and paste it in there holding Ctrl then the letter V.

Firefox


Internet Explorer


Once you have the address in there you click okay and this should be the final result.


Then you click Submit message and you should have it there on the board. I hope this worked and I hope you understand it perfectly.